
F.O.E.s
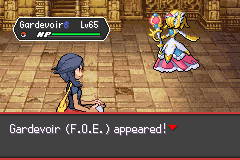
Powerful Pokémon appear on the field as visible encounters. The developer lists F.O.E.s as a core exploration system.
Use this spoiler-light guide to track the eight Strata, their verified level caps, useful quest rewards, and the next reliable reference when you get stuck.
Verified progression markers only. Route and puzzle steps are omitted where no authoritative written source exists.
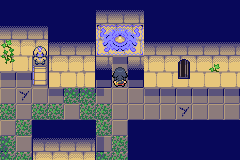
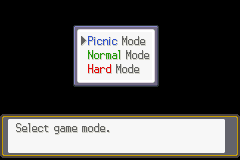
The developer’s v4.1.1 reference lists one cap for each Stratum. Normal and Hard Mode enforce level caps; Picnic Mode removes them. Healing items remain unavailable during battle in all three modes.
Names and caps come directly from the developer’s v4.1.1 sheet. Open a row for the named Hard Mode encounter when the sheet identifies one.
KarinCaptain
RockeyCaptain
ManuelaCaptain
CassianCaptain
Mathilda (Corrupted)Hard Mode sheet encounter
Kitt (Nephilim)Hard Mode sheet encounter
GutruneCaptain
No Eighth-Stratum boss name is published here because the developer sheet does not label one directly by that Stratum.
Stratum 2 naming note. The dedicated v4.1.1 sheet says “Sand Sea of Golgonda”; the developer’s Hard Mode boss tab and an earlier in-game screen use “Desert of Golgonda.” This guide follows the purpose-built Level Caps tab and records the discrepancy rather than hiding it.
Powerful Pokémon appear on the field as visible encounters. The developer lists F.O.E.s as a core exploration system.
Spend 1, 5, or 10 stamina at resource points. The developer describes 1 for variety, 10 for quantity, and 5 as the middle option.
Opened chests remain visible to help mark explored ground. Red chests hold items or money; yellow chests hold TMs.
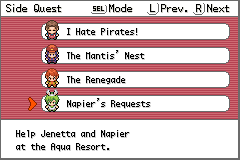
This focused list covers quests that open islands, improve the shop, or award progression tools. It does not duplicate the complete sidequest spreadsheet.
Start: Captain · Dock of Talrega
Task: Find a new sea route to Varley through Naval Exploration.
Reward: Access to Varley
Start: Captain · Dock of Talrega
Task: Find a new sea route to Arundel through Naval Exploration.
Reward: Access to Arundel
Start: Captain · Dock of Talrega
Task: Find a new sea route to Charon through Naval Exploration.
Reward: Access to Charon
Start: Captain · Dock of Talrega
Task: Find a new sea route to Gorenil through Naval Exploration.
Reward: Access to Gorenil
Start: Rikkah · Adventurers Guild
Task: Bring 5 Red Flowers and 3 Emerald to Rikkah.
Reward: Shop upgrade: Level 2
Start: Rikkah · Adventurers Guild
Task: Bring 7 Yellow Flowers and 4 Topaz to Rikkah.
Reward: Shop upgrade: Level 3
Start: Rikkah · Adventurers Guild
Task: Bring 6 Blue and Purple Flowers, 3 Sapphire and Dolomite to Rikkah.
Reward: Shop upgrade: Level 4
Start: Scientist · Pokémon Lab
Task: Catch 40 Pokémon and show your Compendium to the scientist.
Reward: EV-Editor
Start: Hiker · Azure Cave
Task: Find the lost child in the Azure Cave of the Fourth Stratum.
Reward: Magna Vis key item
Start: Manfroy · Jagged Mountain
Task: Solve the mystery of Jagged Mountain.
Reward: Memento Vitae key item
The developer’s v4.1.1 workbook includes a separate postgame boss roster and an Abyssal God guide. The exact story outcome is kept behind the spoiler control below.
Check your game versionThe developer guide identifies the Abyssal God as the final postgame boss and the last obstacle before the true ending.
The boss team changes according to how many tentacles have been defeated. This guide does not reproduce the full team tables.
The available developer references verify order, names, caps, selected boss labels, quest records, and the postgame trigger above. They do not provide a complete written route through every floor.